How to create a PDF with doPDF v5

Printing a test page
After installation you can test if doPDF is working properly by printing a test page.
To print a test page in Windows XP
1. Go to Start and click on Printers and Faxes (if you have the Classic menu go to Start->Settings->Printers and Faxes)
2. In the Printers and Faxes window, right-click doPDF and select Properties
3. In the doPDF Properties window, click on Print Test Page
4. You will be prompted to select a location and name for the test PDF file. Choose one and click Save.
5. After the PDF was created and saved, it will open in your default PDF reader and you will see the printed test page. If doPDF is not registered, a notice is printed at the end of the PDF file. This can be removed from further created PDF files by purchasing a license and registering it.
Accessing the doPDF Printing Preferences
You can access the Printing Preferences window and change the various settings available.
To access the doPDF Printing Preferences window in Windows XP
1. Go to Start and click on Printers and Faxes (if you have the Classic menu go to Start->Settings->Printers and Faxes)
2. In the Printers and Faxes window, right-click doPDF and select Printing Preferences
3. doPDF Printing Preferences window will be displayed and you will have the option to change the various settings available (grouped in tabs)
Creating PDF Files
doPDF installs itself as a virtual printer driver so there is no exe file to run in order to create PDF files.
To create PDF files, you just have to print your documents to the doPDF Printer, like you would print to a normal printer.
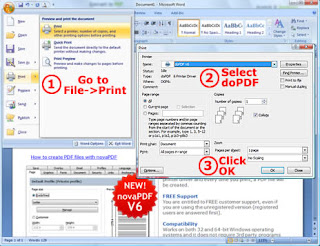
How to create PDF files from Microsoft Word
1. Open the Word document that you want to convert to a PDF file
2. Go to File->Print and select doPDF from the Printers combo-box
3. Click on Ok and choose a location for your PDF file
How to create PDF files from Microsoft WordPad
1. Open the document that you want to convert to a PDF file
2. Go to File->Print and select doPDF from the Printers' list
3. Click on Print and choose a location for your PDF file
How to create PDF files from NotePad
1. Open the NotePad document that you want to convert to a PDF file
2. Go to File->Print and select doPDF from the Printers' list
3. Click on Print and choose a location for your PDF file


Post a Comment